The goal here is to build a Xamarin.iOS app from a git repository, create a releasable .ipa file and push it to the App Store Connect for Test Flight.
What you will need
- A paid apple developer account
- Working Xamarin.iOS project in a Source Control system that Azure DevOps can access
- If you need a sample application, you can grab one here
- Azure DevOps account and project (it is free, go get one)
Register app ID and get certificate and provisioning profile
At the end of this section you should have .p12 signing certificate and a .mobileprovision provisioning profile. There are some good content about these next steps so I will just refer to them:
Create a build
The build pipeline is the heart of this post. I’m assuming you are familiar with Azure DevOps pipelines and such. Follow below steps to get the build setup:
- Create a new build pipeline using the visual designer (it is easier to import the certificate and provisioning profile this way)
- These are all the steps you will need in your pipeline
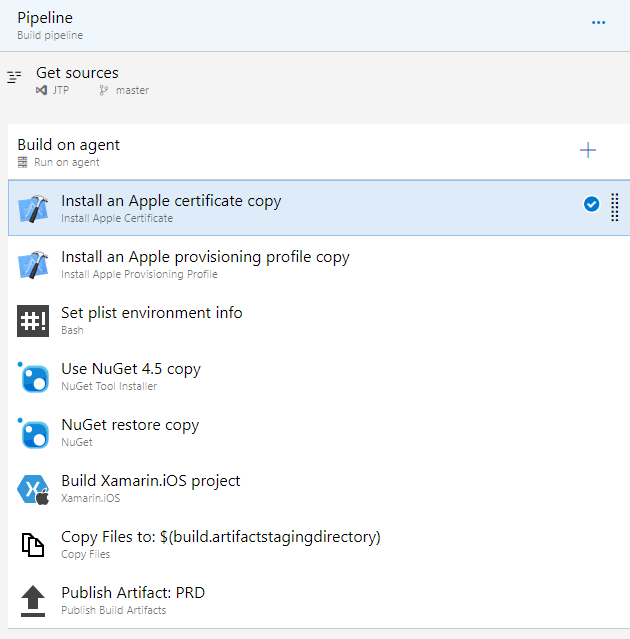 All build steps needed to build the iOS app
- Install the distribution certificate
- Import your .p12 file in the Certificate field
- Create a pipeline variable named P12Password with the .p12 password and set it as secret
 Install Apple Certificate step configuration
- Install the provisioning profile
- Upload your .mobileprovisioning
- If you are using Hosted builds, ensure to check the Remove Profile After Build option
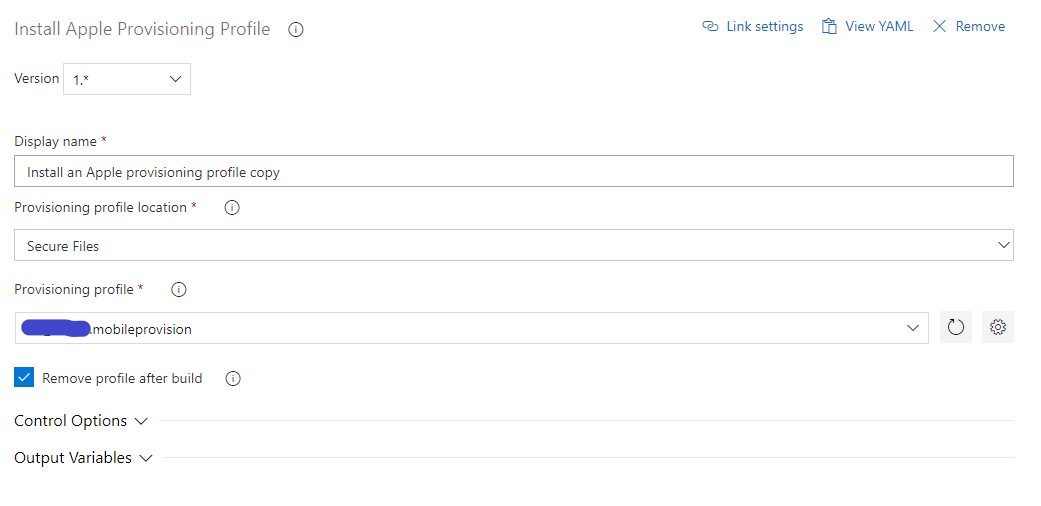 Install Apple Provisioning Profile step configuration
- Modify the info.plist file (optional)
- I use this to change app bundle id, icon sets for QA and PRD environments and finally set the app build number.
- To use the BuildNumber in the app version, you will need to set the Build Number Format to
$(date:yyyy.MM)$(rev:.r). - You may add or remove steps in the bash script below (provided for easy copy/paste)
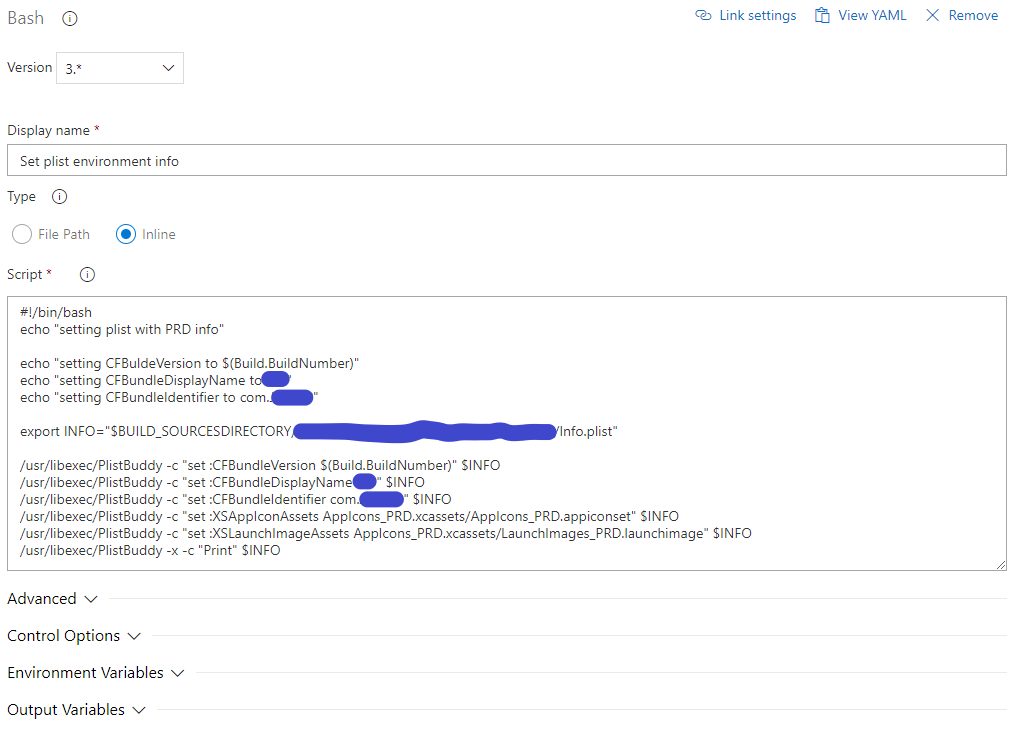 Ensuring the info.plist matches your app settings
- Install the version of nuget your project needs
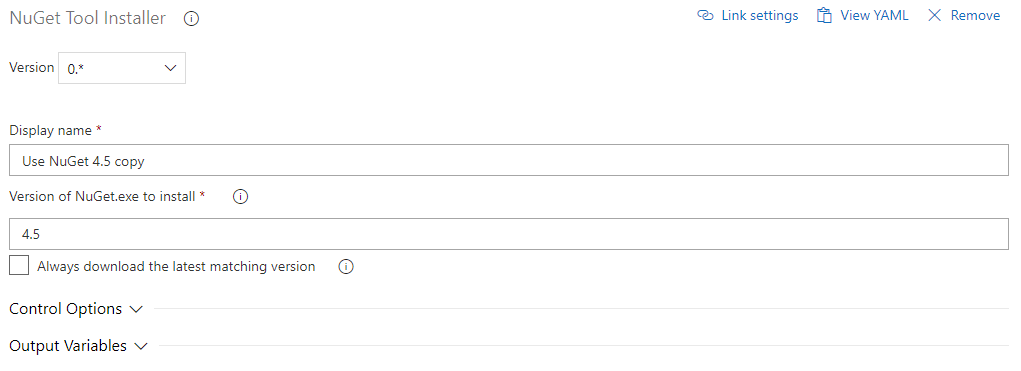 Nuget install step configuration
- Restore packages
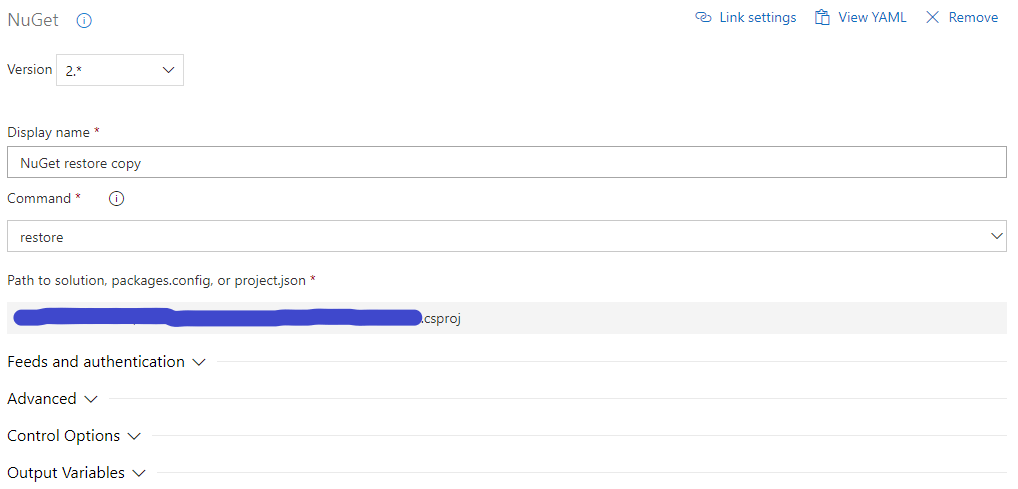 Nuget restore step configuration
- Build!
- Select the right build configuration
- Check the Create app package option
- Provide
$(APPLE_CERTIFICATE_SIGNING_IDENTITY)in Signing Identity. This is an automatic variable output from the Install Certificate step - Provide
$(APPLE_PROV_PROFILE_UUID)in the Provisioning Profile UUID. This is an automatic variable output from the Install Provisioning Profile step
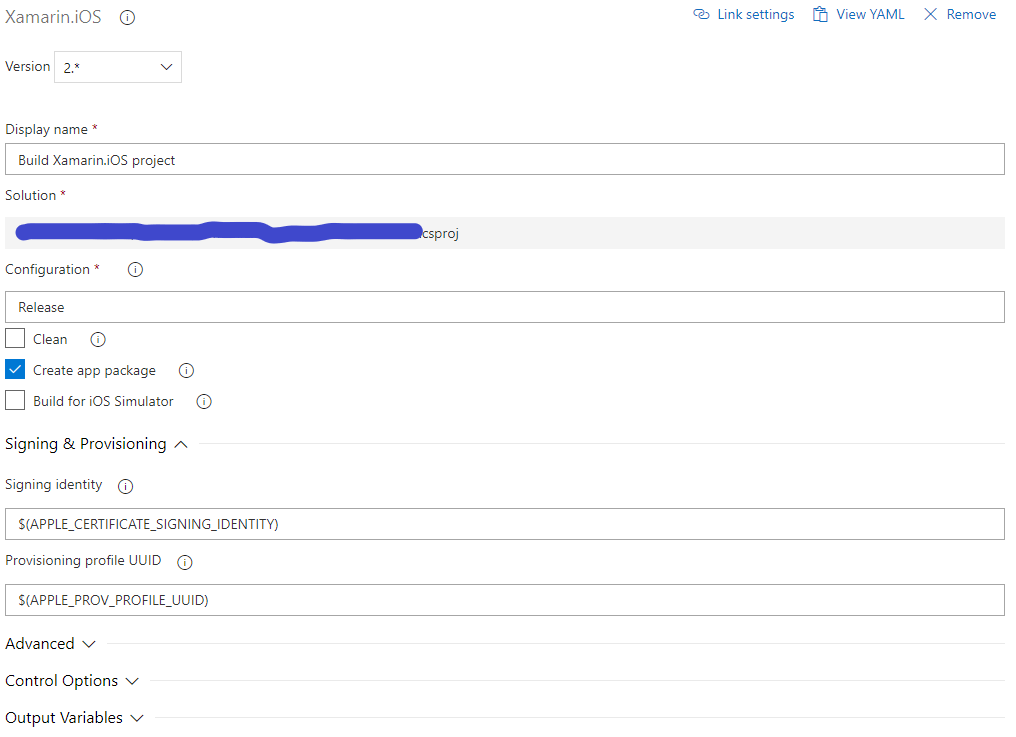 Build Project (not solution) step configuration
- Copy the .ipa to staging
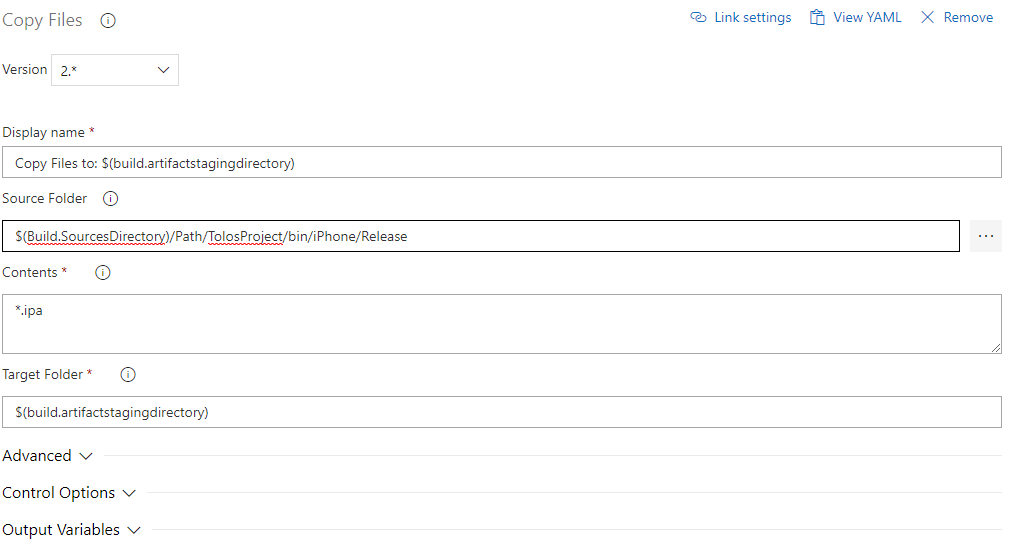 Copy files to staging directory step configuration
- Publish Artifacts
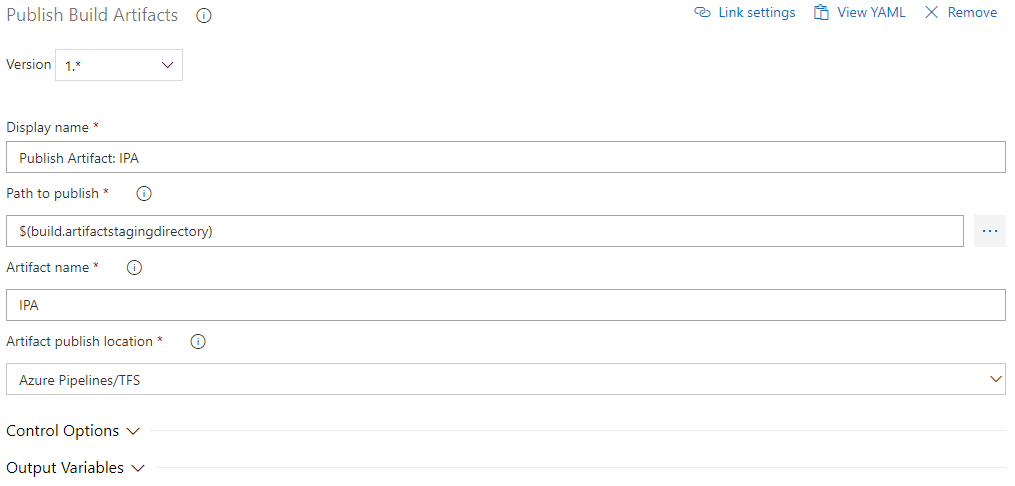 Publish build artifacts step configuration
Create a release
The release is much simpler. All you need is to push the .ipa to Test Flight. There is a couple of things to be aware first though:
- You need to create the app in App Connect Store first.
- You need to manually push the app via Application Loader at least once before the release will work.
- The release uses fastlane so if you use a private MacOS for builds you may need to install it. Check the fastline guide.
The release will look like something like this:
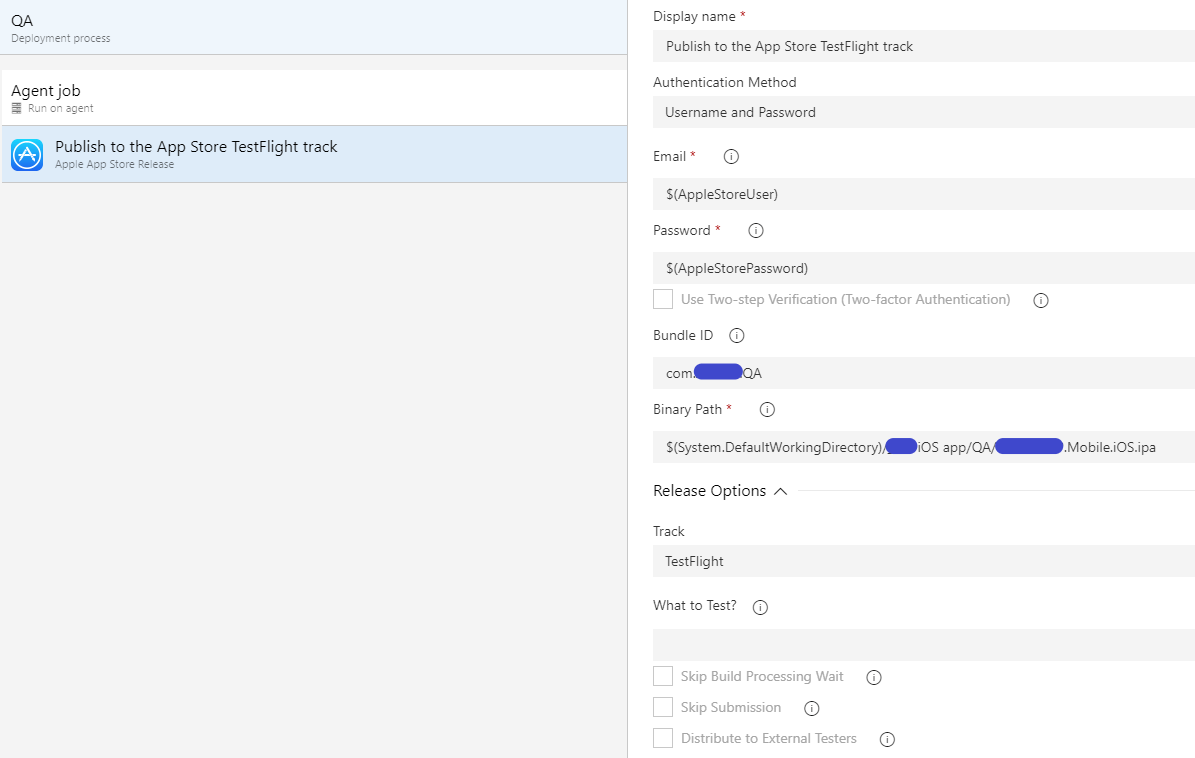 One step Release pipeline configuration
Special considerations
- Note that both nuget restore and xamarin build were executed over the .csproj file instead of the solution. I’m not sure why, but every time I use the .sln the build fails.
- Apple store require you to provide export compliance documentation and will not automatically publish the app for testing without this. There are ways around this. Read about it.